How do I assemble the Twist Pro Steel Bottle?
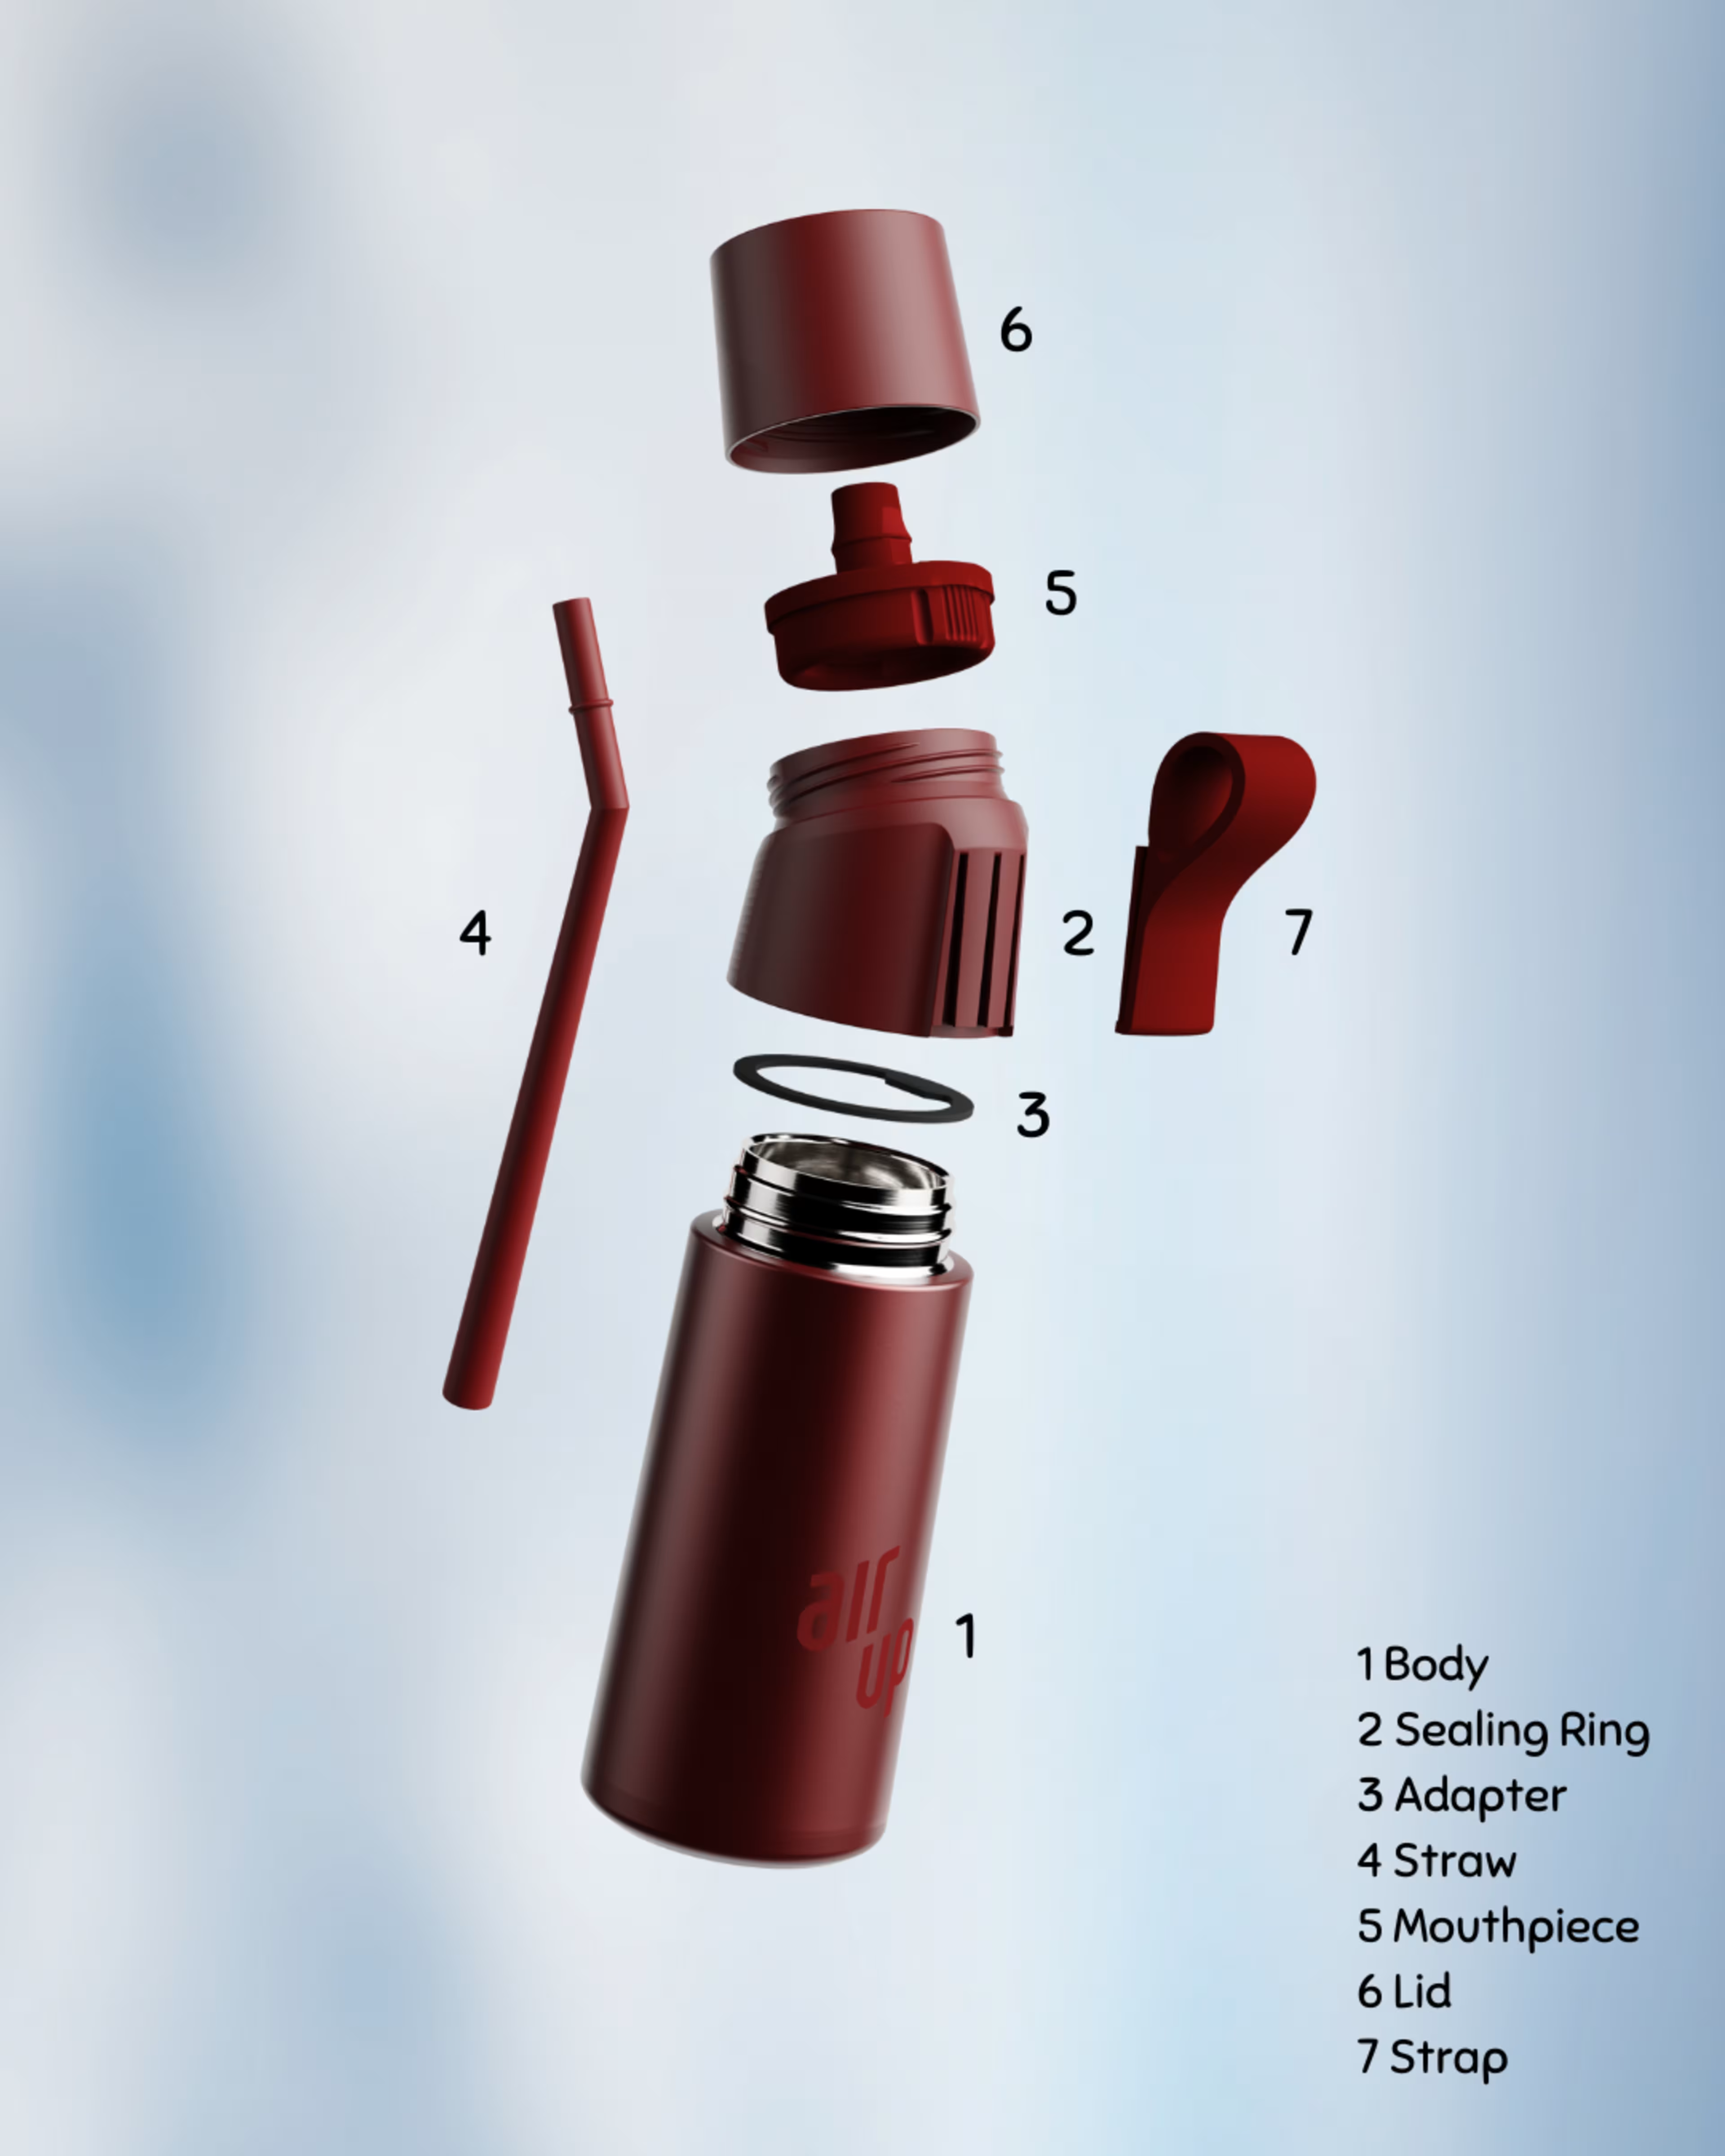
How to Get Started Like a Pro
Step 1: Fresh Start, Who Dis? Rinse all the parts with lukewarm water and a little mild soap before the first use. Trust us, your taste buds will thank you.
Step 2: Seal the Deal Pop that sealing ring into the adapter (unless it’s already chillin’ there). Pro tip: Make sure it’s lying flat—nobody likes a leaky situation. 👉 Got a Pitch Black or Silver bottle? You’re golden. The sealing ring’s already built in, so no extra work for you.
Step 3: Twist & Shout Screw the adapter onto the bottle body nice and tight. No loose vibes allowed.
Step 4: Straw Goals Slide the straw into the mouthpiece until it hits the stop line. (Yes, the tip should face down. No upside-down drama here.)
Step 5: Click It In Press the mouthpiece—with the straw in it—into the adapter until you hear that satisfying *click*. Boom, you’re halfway to hydration heaven.
Step 6: Pod Squad Assemble Place your flavor pod onto the mouthpiece with the sticker side up. 👉 Got an ActiveOn mouthpiece? The pod activates itself when you take the lid off. Magic, right? ➕ Not in the mood for flavor? Slide the pod up a bit to put it on pause. No judgment.
Step 7: Lid Lockdown Screw the lid on tight. Like, *really* tight. We’re going for leak-proof, not “oops, my bag is soaked.”
Step 8: Strap In Attach the strap to the adapter. Now you’re hands-free and ready to flex your fancy bottle wherever you go.
🎥 Prefer a visual guide? Watch our step-by-step tutorial on YouTube Shorts.