How do I assemble the Twist Pro Bottle?
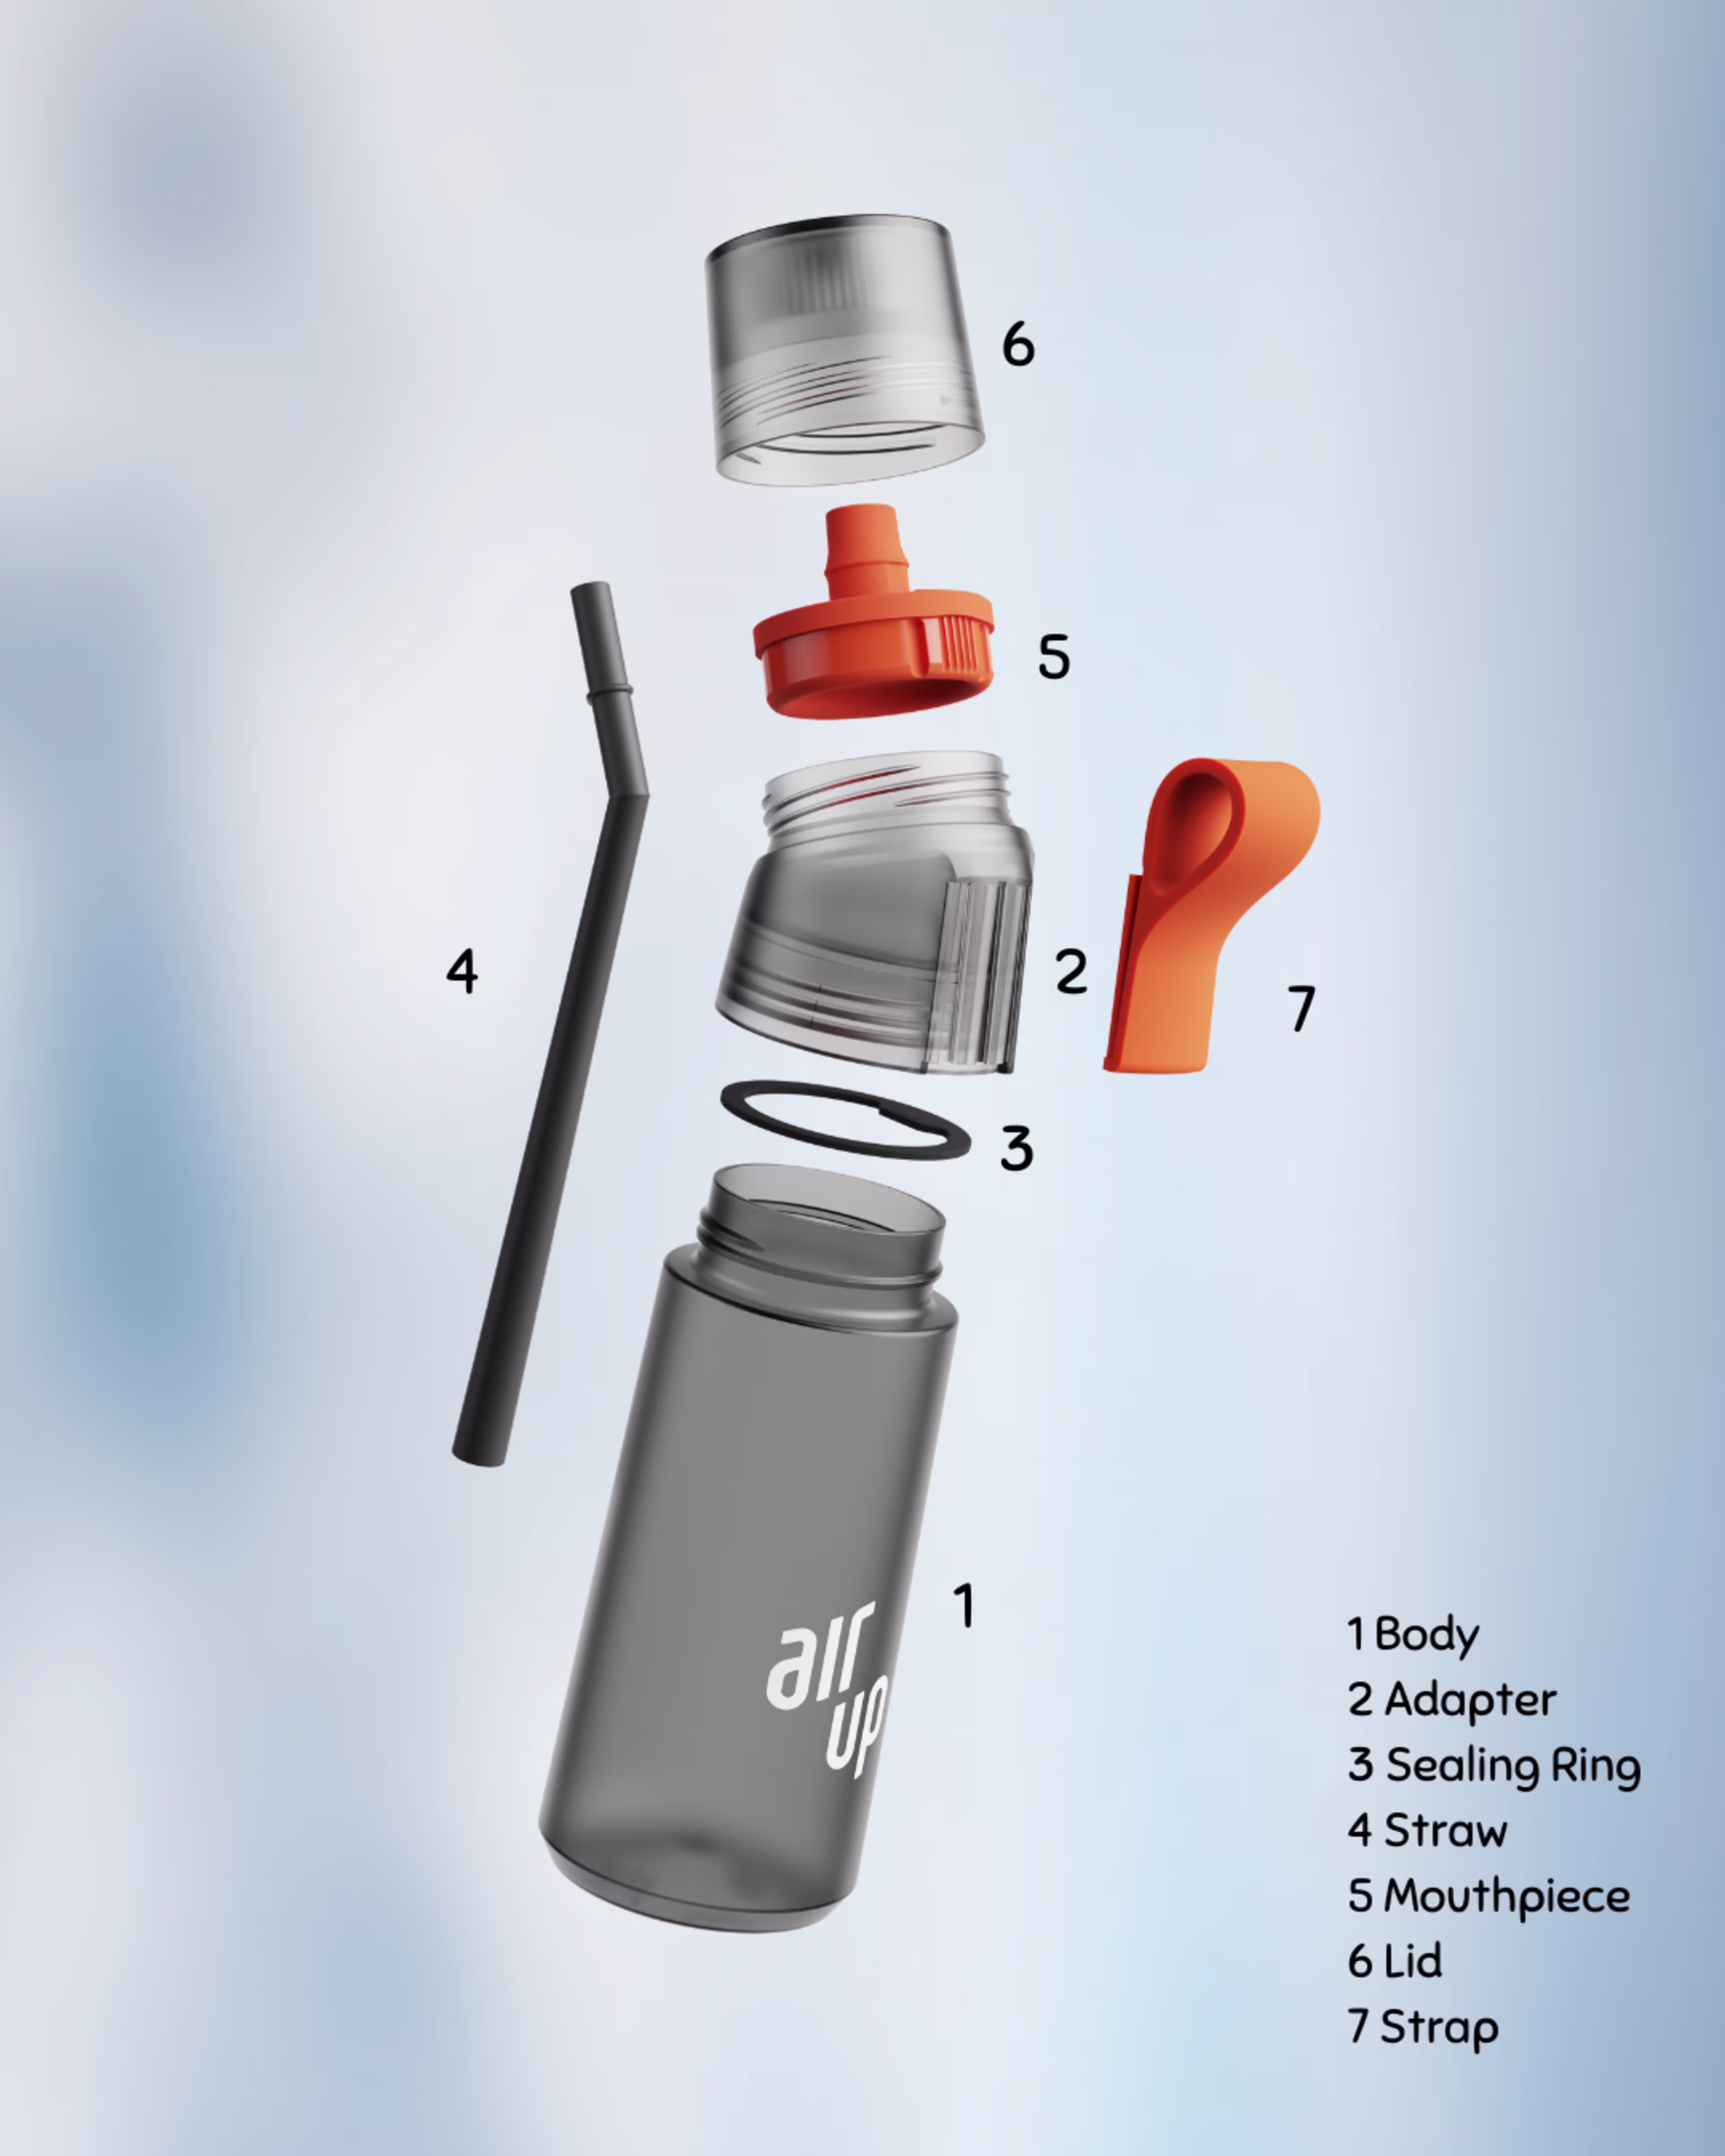
How to Get Your air up® Twist Pro Ready (aka: Let’s Get This Party Started)
Step 1: Fresh Start, Always Rinse all the parts with lukewarm water and a little soap. No one likes a funky first sip.
Step 2: Seal the Deal Check the sealing ring in the adapter. If it’s MIA, pop it in and make sure it’s lying flat—leaks are not the vibe.
Step 3: Twist & Shout Screw the adapter onto the bottle body. Tighten it up like you mean it.
Step 4: Straw Goals Slide the straw into the mouthpiece until it hits the marked line. (Pro tip: The tip should point down. Gravity, baby.)
Step 5: Click It In Attach the mouthpiece (with the straw already in it) to the adapter. Push it in like you’re locking in your favorite playlist.
Step 6: Pod Squad Assemble Pop a flavor pod onto the mouthpiece, sticker side up. - Thanks to the ActiveOn mouthpiece, the pod activates as soon as you ditch the lid. Boom—flavor unlocked. - Want to hit pause on the flavor? Slide the pod up just a smidge until it’s off-duty.
Step 7: Lock It Down Screw the lid on tight. No leaks, no mess, just vibes.
Step 8: Strap In Clip the strap onto the adapter. Now you’re hands-free and ready to flex your hydration game.
Sip, slay, repeat. That’s it.
🎥 Prefer a visual guide? Watch our video tutorial here: air up® YouTube Shorts